
Greenhouse Build continues
There is fantastic news on the farm! We have made progress on the greenhouse.

Over the winter of 2024-25, we began planning a greenhouse on the hill. Sunlight all day on a fairly flat piece of our ridgeline. We looked at all kinds of possibilities. Prefabricated, hoop house, PVC structure, Walipini's, etc. In the end we decided on a wood frame Walipini. The Walipini is a north American Native idea that date's back possibly thousands of years.
We began excavating down below the frost line but only made it about 2 and a half feet before hitting ledge. So we have settled on a semi-walipini. We then milled 8 inch square beams for the foundation. With the west wall the highest from ground, we needed to support that side, so we drilled into the ledge and hammered in re-bar, set cement blocks and filled them with concrete, while also bonding it to the rock underneath. With the corner posts set, we could set the beams. Beams set and pinned together, it was time to build some walls.
The walls are ten feet tall and the studs are ruff sawn 2x6 white oak. We built the two side walls first. The side walls are 6 feet long. The back wall is 16 feet long and we could not manage one solid wall so we built three, about five feet long, which we were able to manuver; we put them in place and lagged them to the beams and each other. The side walls went up and were tied together with the back wall. Everything was going great.

The next step was a king (or carrier) beam. Having more knowledge or better planning, we probably would have made the footprint just under 15 feet so we could have milled a solid king beam. Oh, by the way, this is the beam that spans the distance between the two side walls to support the roof. This obviously needs to be very strong as it holds the walls together and the roof up. Add snow like we had this past winter and we are talking thousands of pounds. So we took four of the oak planks, and cut them down with opposing overlaps and laminated them together with structural lag screws and wood gl. This beam took several days to build and would turn into the bane of my existence. In later pictures you will see a board about half way down the front of the side walls holding the side walls together. We did not do this last summer. We added two boards, to the front of the side walls, on an angle and

used the tractor to pull the beam up the ramps. It worked great until the beam reached the precipice. In the picture of the beam, you can see where the ramps terminate. I suppose if we had screwed the ramps in above the top plate, we might not have had an issue, but I did not think of that until now.
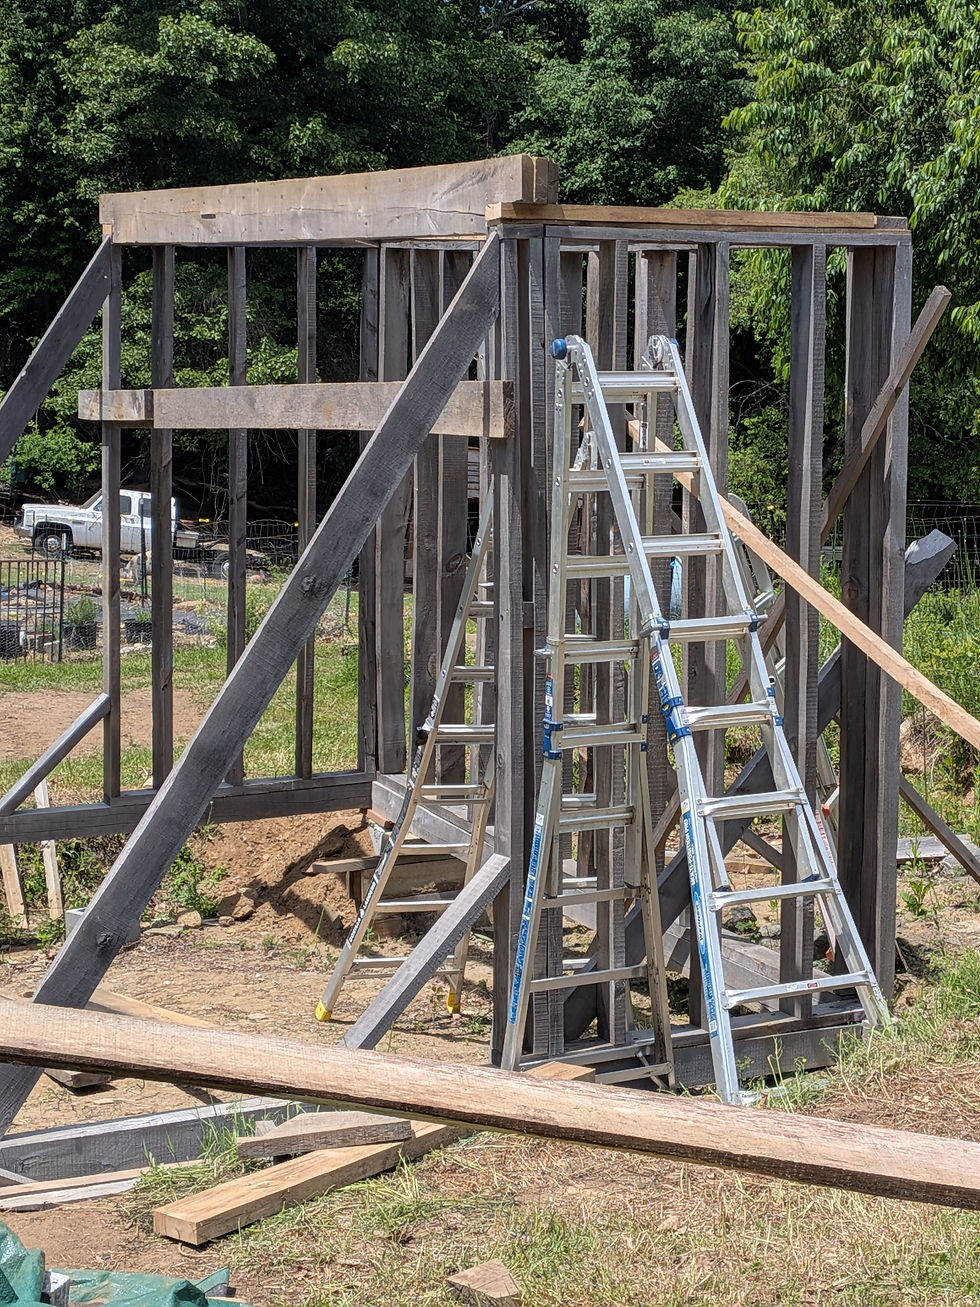
So we would pull it up the ramps and right at the top it would catch and then spring off and come crashing down. We did this five separate times. The final attempt, the beam actually pulled the foundation off the supports and the beam landed under the foundation. We put the project on hold while we came up with a new plan. We talked and thought and thought and talked all fall and winter. Do we rent a telle-handler or some other equipment? Do we buy a manufactured carrier beam? In the end the solution we could afford was to ask for help. We put out a text asking our friends and family to join us to get this damn beam in place. All our friends and some of my family showed up. With a couple people that actually have building experience and the rest having above average intelligence, a plan was formed quickly and activated. A top plate was added and some bracing as well as the board across the front. With people below the beam supporting its ascent and one person up top at each end, Sarah motored the beam up the ramps one last time. With two of us up top with pry bars, and that front brace holding the walls together, that beam fell right into place. I must admit I was giddy as a schoolgirl to see that beam in place.
With handshakes and well wishing, the crew went to sup. We had made mac & cheese, smoked home cured ham, smoked leg of lamb, potato salad, corn salsa, and hot dogs for the kids. We also made sure to accomplish our mission prior to feeding the troops.
And with that, we were back in action. A dream returned. The feeling of anguish and failure evaporated in the hot spring sun. Since then, I had a week off and was able to really focus on the build. Next up was a few more corner support boards and then We went to work on rafters.

We attacked the slant roof rafters first. At 13ft 4 inches, I was concerned about having enough timber. We were in fact four short. Off to the log pile where we found one large white pine and a smaller oak log that were long enough. Unfortunately, we haul most logs with a 12 foot trailer causing us to cut them at 12 feet. We chose the pine as I was soar and did not want to lug around more oak.

We moved that log onto the mill and achieved success. Five, 2x6x14 foot boards. A very slow tractor ride up the hill and onto the work table. We notched them out and started moving them into position. 16 inches on center. We pinned them in place with 10 inch structural screws, "toenailed" with 3.5 inch deckmate screws, and blocked at the half way mark and the terminal end. You can see the double rafter at the left side. That was purely a math error. We could have gone with 24" on center,

but I wanted the extra support of 16" and did not account for some of the boards being thicker than others when we laid them out. When we got to the far end we were at 20" so we decided to add an extra. Later on, we will add hurricane straps to each rafter. In the picture to the right you can see the "toe" I left on.
With the slant roof complete, we began working on the flat roof rafters. The roof is a 5 degree drop; just enough to shed water.

We want a snow load in the winter as it does insulate. We also want to add solar panels to the roof at some point in the future and a mostly flat roof will be easier given it slants down to the north, away from the sun. If we did a standard pitch roof, we could not put solar panels up there. The flat roof rafters are 2x10 white pine, with 1 inch pine boards over the rafters. The steel roofing will go over that. With the sturdy base and the riser strips the steel will be strong enough for walking. At some point in the future, we might remove the corrugated roofing, add a railing, mount the solar panels off the side, and make a lookout...it is an amazing view.
We will end this here and publish the post. The saga will continue in future posts.


Comments